MacBook Air Hard Drive Replacement
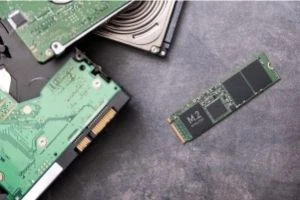
The Macbook Air is a solid laptop, combining a lightweight design with reliable features. Ever since the new solid state drive (SSD) replaced the original model’s hard drive in 2008, the Air is faster and more durable than ever before. Much like any laptop, however, MacBook Air models are still prone to internal failure. If you think your drive is damaged, don’t fret. We’ll cover everything you need to know about a MacBook Air hard drive replacement, below.
Do you need a Macbook Air Hard Drive Replacement for Your Laptop?
Laptop hard drives can malfunction or become defective for many reasons. Typically, the odds of needing MacBook Air SSD replacement increase with prolonged laptop use. Look out for these common warning signs pointing to hard drive failure:
- Persistent, but irregular crashes
- Continual cryptic error messages, especially when doing basic tasks, like moving files around
- Re-arranged, changed, or disappearing folder and file names
- Long wait times when opening files and folders
- Excessive overheating
How Much Does a MacBook Air Hard Drive Replacement Cost?
Just like the MacBook Pro, repair costs for replacing a MacBook Air’s drive can vary quite a bit. Services charges will be based on whether your laptop has a hard drive (HDD) or an SSD, the type of upgrade you want, and your laptop’s model. Newer Air models, no older than the 2018 version, unfortunately, have their drives affixed inside the computer and cannot be individually replaced. Whether you choose to seek assistance from a local Apple Store or a certified professional, such as CPR, is entirely up to you. Just keep in mind that repair costs will likely fluctuate between each provider. You can typically expect charges to range anywhere from $200-$600.
Ensure the SSD is Unrepairable
Before you take measures to replace your SSD, confirm that the drive is indeed broken and unfix-able. Start by running Disk Utility from Apple. If that doesn’t do the trick, try macOS Recovery. If you’re still left scratching your head, you can test some other repair methods out if you’re tech-savvy and have the time. At this point, however, we suggest turning to a professional or using your Apple device warranty, if it hasn’t expired. If you decide to replace the drive yourself, make sure you’re up for the challenge and follow the steps below. Also, keep in mind that changing internal hardware can void warranties on newer Mac models.
How to Replace a MacBook Air Hard Drive – DIY Guide
Follow CPR’s guided process step-by-step to get your MacBook Air’s drive replaced.
Step 1: Backup Your Laptop
First, you’ll need to backup your laptop. We recommend using Apple’s Time Machine backup. This makes moving your laptop’s old SSD contents to the new drive much more manageable. However, you can use another backup program if you prefer.
Step 2: Get a Compatible SSD
It’s essential to have a new and compatible SSD ready for your MacBook. Shop at a place that carries Apple gear and accessories, and make sure to jot down your MacBook make and model. You may also want to consider investing in an upgrade kit with an external drive enclosure for additional storage.
Step 3: Power-Off Your MacBook Air
Now, you’ll need to power-off your laptop. To proceed, go to the Apple icon at the top left corner of your screen, and scroll down to ‘Shut Down.’ Once you click, you’ll be asked to confirm. Click ‘Shut Down’ once more to initiate.
Step 4: Remove the Back End of your Laptop
To take off the back piece of your laptop, first, grab a Pentalobe screwdriver and a container to keep the screws in while you work. Then, remove the ten screws from the bottom of your Mac.
Step 5: Take Out the Battery
Once you get all ten screws out, it’s time to disconnect the battery. Start by taking the bottom piece off slowly so you can get a clear inside view. The battery is located alongside the bottom. To remove, pull upwards on its electrical connector slowly, one edge at a time.
Step 6: Remove the SSD
After the battery’s disengaged, you’re ready to take out the original SSD. You’ll find it positioned next to the battery. With your screwdriver, loosen the screws to lift the drive, and lightly pull horizontally to separate it from the connector.
Step 7: Install the New SSD
Next, take your new SSD and slide it into the socket. When its firmly in place, re-attach the anchor screw, re-insert the battery, and attach the bottom panel back on your laptop.
Step 8: Set Up your MacBook
Finally, you’ll need to re-boot your laptop. Your new SSD will be blank, so it needs to locate an operating system before using it. Depending on your preferences, there are a few techniques you can initiate. The easiest way involves using Apple’s Time Machine backup that we discussed in step one. This will transfer all your saved data to the new SSD. Once you restart your laptop, your macOS Utilities screen should pop up. From here, you’ll want to click, ‘Restore from Time Machine backup, and choose the latest backup. The backup can take up a while, depending on your internet speed and how much data needs to be transferred onto the new drive.
Let Cell Phone Repair Upgrade your SSD
After the data has been restored to the drive, your laptop should be ready to use. To guarantee your MacBook’s drive is correctly replaced the first go around, consider contacting the experts at CPR Cell Phone Repair. Apart from MacBook Air models, our technicians are certified in fixing multiple Apple devices, ranging from MacBook Pros, iPhones, and iPads. Get in touch with us today to learn more about our repair service options.


MORE ON Microsoft Surface Pro 4
WHAT CUSTOMERS ARE SAYING
Salil Chaudhry
I had iphone 12mini which stopped recognizing battery, initially went to Apple store and the diagnostics suggested that the logic board is bad and I should get a new phone. Typical Apple. I looked up online on getting my phone repaired and came across CPR. I sent them the exact problem and visited at their service center next day. Ravi, owner met with me, did an initial investigation/ diagnosis and told me it could be battery or charging point IC, which could have gone bad. He also gave me a rough estimate based on initial diagnosis. I left my phone with them and next day got the call informing me that after diagnosis they were able to find the root cause which was a faulty battery. They replaced it, estimate was already given. I still continue using the phone to make sure everything this up and running as usual. But I am happy and satisfied with the service provided by Ravi & his team at CPR Poway center.
Debbie
Our cell phone would not turn on so brought in to CPR Repair; Kordell looked at it and had it working within a couple of minutes! Friendly and super pleasant guy....highly recommend!
Matt Real
Extremely Fast. Technicians have great customer service. Highly recommend! They will continue to get our business.